
This post is all about learning to set up your drone and camera to get the best possible picture quality out of your sensor, whether you are shooting on the tiny Mavic or an M600 carrying a full sized DSLR.
With the recent surge in affordable drone technology there are plenty of aerial photos popping up online. Many people are taking pictures, but few are taking great photos.
(Don’t like reading long blog posts? Let me quickly condense this post for you.) Read on past the break to see the how & why explained in more detail:
1. Make sure your drone is running smoothly. Do a stick/controller calibration, make sure your compass is calibrated, even run an IMU calibration to ensure the smoothest possible flight (to learn how to do an IMU calibration on the DJI lineup of drones visit the downloads page under your respective drone and download the latest copy of the manual). Make sure that no propellers are nicked or dirty, as this can introduce vibration into the airframe.
2. Ensure that batteries are fully charged, warm (when flying in cold weather), and that your camera lens is clean prior to takeoff. A battery heater is not necessary, but handy.
3. Set your camera to take RAW photos. RAW+JPEG is also fine.
4. Set your white balance to “Cloudy” or “Sunny” depending on conditions.
5. I typically recommend setting your camera to a semi-auto exposure mode (usually shutter priority). Use manual mode when shooting panoramas to prevent big mis-matches in exposures when you go to stitch the images together.
6. If shooting at dawn/dusk/night, do a control stick calibration to minimize or even eliminate any drift.
7. If shooting for Instagram/Facebook etc you can typically push your ISO fairly high with good results. If shooting for enlargements you will want to keep your ISO as low as possible. This will keep the “noise” in the final print to a minimum.
8. Edit your photos in a proven photo editing program such as Adobe Lightroom. Free editing programs are available but are typically no where near as robust or intuitive.
9. It is typically easier to bring out shadow detail than to reduce blown out highlights. Expose for the sky to maintain detail, use the Gradient tool to bring out foreground details.
10. Easy on the saturation and vibrancy sliders when editing. Same goes for vignetting. A photo with proper composition and true to life colours (set using white/black points and white balance) will typically look better than a photo with neon green grass and smurf blue skies.
For the detailed version of this post keep reading past the break!
——-
Aerial photography has long been my favourite genre of photography. It is where it all began for me.
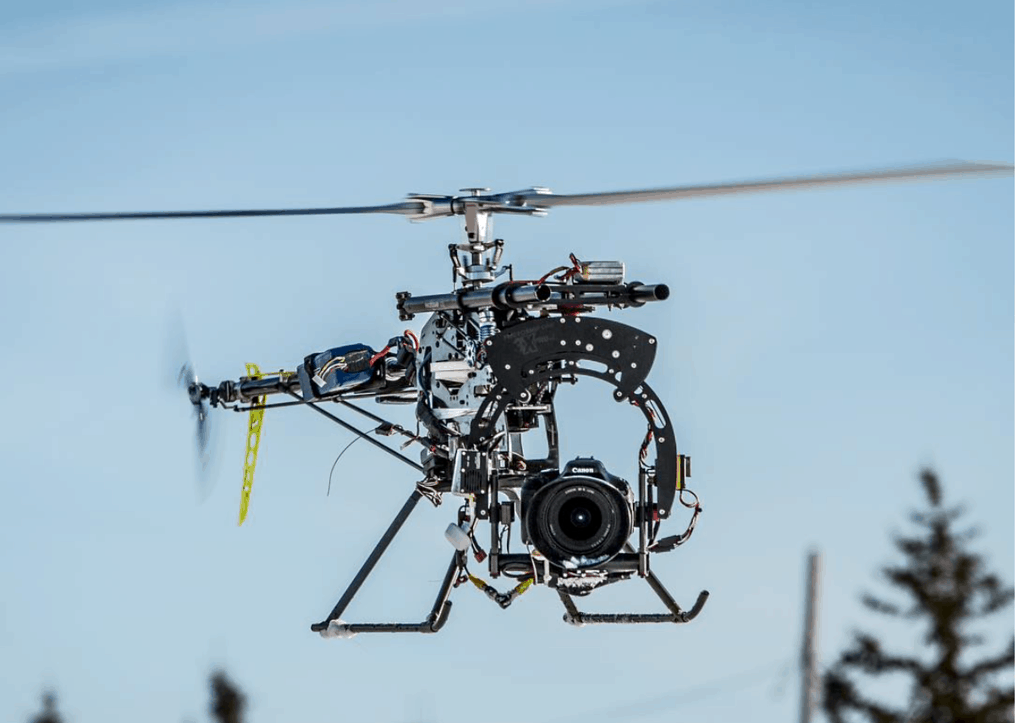
Years ago I had a large radio controlled single rotor sport helicopter (an Align Trex 700) with a GoPro strapped to it. My wife and I went around Southern Alberta taking farm and acreage photos. I eventually added a Canon T3i to the heli and began to enjoy photography more and more.
It was an expensive hobby/business however.
The single rotor heli flew great when it flew, but more often than not it was on the bench for repairs. It required a fair bit of skill to fly and maintain and there was no form of stabilization or position hold on it.
With a rotor diameter of more than a meter spinning at 1500 RPM it was also a dangerous machine to fly…
I also occasionally shot out of full sized helicopters and planes and at times I wondered if it was not more cost effective and more hassle free to stick to that…
Fast forward a few years and things have changed drastically.
We now have drones for around $1000 that are worlds better than the technology of only a few years ago. Since the single rotor heli I have had many UAVs and drones, including most of the DJI lineup.
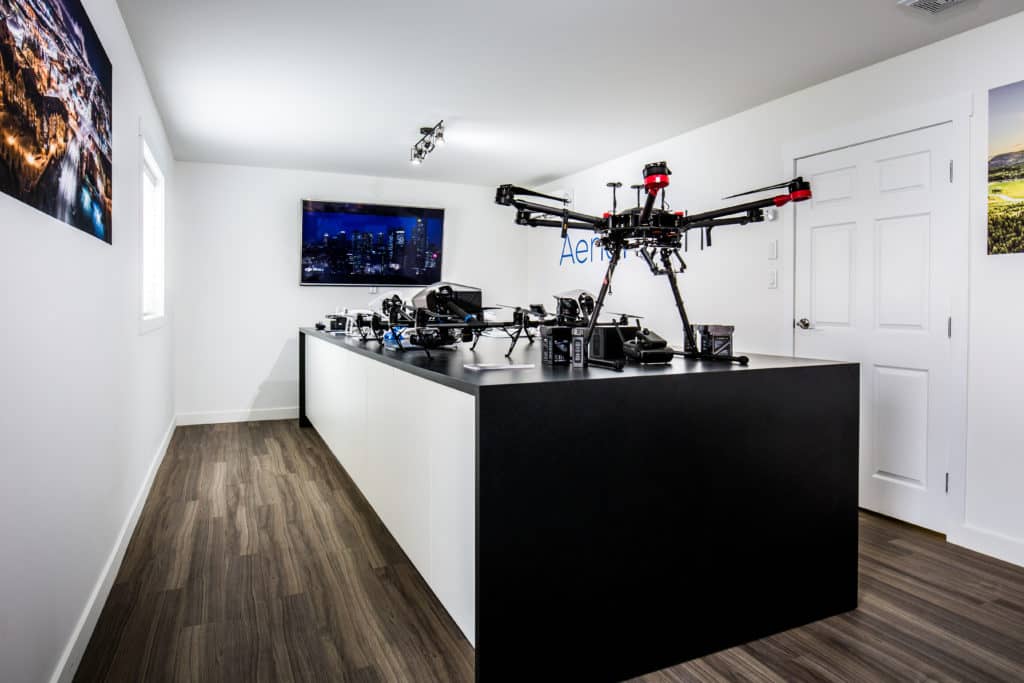
In fact, a few years ago we actually started a DJI dealership in Southern Alberta (www.AerialTech.com) as we noticed the industry changing from companies hiring folks such as myself to take their aerial photos to companies buying their own UAVs.
One of the most popular units we have sold in the past years is the DJI Mavic. Incredibly compact, great flight range, excellent flight time and a solid camera make for a very desirable drone.
Over the years I have posted many photos on social media sites and my website that were taken with the DJI Mavic and similar drones. A question I have received over and over again is “How do you get your pictures to look like this? Mine definitely don’t come out like that!”
The purpose of this post is to hopefully pass on some of my knowledge of aerial photography and help you get the most out of your drone’s camera and to set up your drone properly prior to flying.
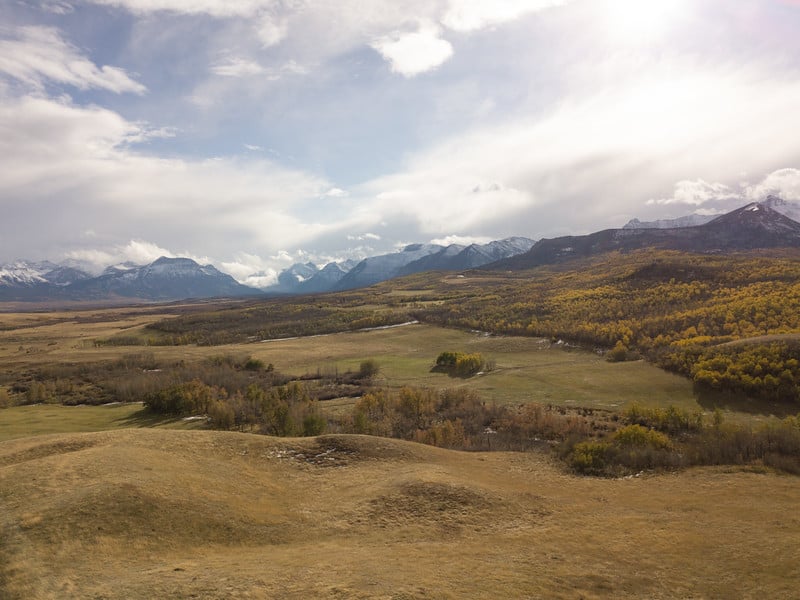
It doesn’t matter too much whether you use a Mavic, a Phantom, Inspire etc.; any of these drones have the capability to produce amazing photos. I will break down the image at the top of this post and show you how I edited it into the landscape photo you see above.
First, Set up Your Drone
Before digging into camera settings you will want to make sure your drone is running properly. A well sorted drone will make it easier to produce sharp images, even in low light.
Step 1-Check the propellers & motors
The propellers and motors are typically the only moving parts on your drone (other than the camera gimbal). It is very important that these are in good condition prior to a photo shoot.
Although a mid day shoot in bright light will allow for plenty of shutter speed to cancel out any vibration in a photo, it is towards evening or at night that perfect balance of your props and motors is important. The low light forces a slower shutter speed, and even a small amount of vibration on the drone can blur your final image.
When checking your propellers, make sure there are no nicks or dings, wipe off any bugs (or bug parts) and make sure the prop mount is not all worn out from extended use. Propellers are typically very cheap and if you need the absolute best results on a shoot it probably won’t hurt to throw on a new set prior to flying your mission.
Also check your motors. Remove the props and spin up the motors, ensuring that there is no obvious vibration in any of the arms. Some folks even go so far as to use a stethoscope to make sure there are no frequency variations before flying!
Step 2-Do a control stick calibration
In my opinion this is one of the more important steps, especially when shooting towards dawn/dusk or at night. Occasionally your drone will lose sense of where “centre” is on the controller.
Even though all your control sticks are centred your drone may slightly drift to the left or right. Alternatively it may hover in place but slowly yaw (rotate) without any input.
Again, the combination of slow shutter speeds and a slightly moving drone will introduce blur in the final image. I strongly recommend calibrating your controller prior to shooting any low light or night photos (again, if you need to learn how to do this have a look at the respective manual for your drone. If you are using a DJI machine, you can download the manual under the “Downloads” section of the DJI website).
Second, Set Up Your Camera
When taking photos with your drone don’t worry too much about which drone you use, but rather focus on setting up your drone to take the best possible photo. The mountain landscape photo at the top of this post was taken with a Mavic Pro, a drone with a small 12MP camera sensor.
Step 1-Make sure your camera is set to take RAW photos.
You can set it to take both RAW+JPEG, but having it set to RAW at minimum is important. Contrary to what many people believe, shooting a photo in RAW does not give you more resolution or a sharper image. If you have a 12MP camera, your photo will be 12MP whether you shoot in RAW or JPEG.
The benefit of a RAW photo lies in the fact that it preserves all of the color data, and gives you much more latitude when editing the photo later.
Don’t be surprised if your RAW photos look worse than your JPEG photos. RAW photos typically look a little flat, and void of color or “pop”. This is done to preserve highlight and shadow detail which gives you more latitude when editing the photo later on.
See the photo below? You will notice the photo on the top (the RAW photo) looks much duller and “flat” compared to the edited photo on the bottom.
There were no colors added into the photo on the bottom, it is simply an enhancement of the colors and contrast found in the RAW file.

Step 2-Set your white balance.
Although you can easily adjust the white balance of a RAW photo in any editing suite, it makes it much easier to batch edit or stitch panoramic photos if your white balance is set the same across all of your images. I would recommend picking one white balance and sticking with it for the duration of a flight.
White balance can typically be set to “Sunny”, “Cloudy”, “Tungsten Light”, “Fluorescent Light” etc.
In most cases aerial photographers will use either the “Sunny” or “Cloudy” setting. Although these will not give you a perfect white balance, the preset settings typically get quite close, and can be easily adjusted in post (as long as you are shooting RAW).
Step 3-Set your exposure mode.
Many people feel that in order to take good drone photos they need to set their camera to “Manual” and figure out all the settings on their own.
I disagree.
Unless you are very comfortable with your camera and can adjust shutter speed, ISO, and aperture on the fly without thinking, I would strongly suggest choosing a semi-auto exposure mode such as aperture priority or shutter priority when shooting.
There is nothing worse than setting your camera to manual mode, shooting a whole series of photos and finding out they are all way under or over exposed.
I typically shoot in shutter priority, unless I am using a drone with a variable aperture camera (eg. Inspire 2 with X5S camera) where it is often beneficial to shoot around the “middle” of the lens’ aperture range for the sharpest photos.
If you are shooting mid day/bright sun/minimal cloud cover you will probably be able to push your shutter speed to at least 1/1000 or even higher (the above photos were shot at 1/2500).
Where I do recommend shooting in manual mode is when shooting panoramas. Having a fixed exposure setting between shots makes for a easier/cleaner stitch. More on this in a future post…
Step 4-Keep your ISO low-ish
ISO, for those of you that do not know, is basically how sensitive your camera sensor is to light. The higher the ISO, the more sensitive it is to light. The more sensitive it is to light the higher you can keep your shutter speed.
Higher is better then, right?
Yes and no.
The higher the ISO, the more sensitive it is to light and therefore the higher your shutter speed (typically a good thing to keep your photos sharp).
The flip side is that the higher ISO number introduces “noise” or “grain” into an image. The smaller your camera sensor (the one in the DJI Mavic is pretty small), the more susceptible it is to noise. Therefore you will want to keep your ISO as low as possible without compromising shutter speed.
The Mavic is comfortable at up to about 400 ISO, any higher than that and it will start to get quite grainy. That being said, editing suites such as Adobe Lightroom have excellent noise reduction capabilities that will greatly reduce visible noise.
For social media posts of your photos you will be able to push your ISO quite high with minimal visible loss of quality. Where it is more important is when doing large prints or enlargements: High ISO noise is much more noticeable when printed in large format.
Third, Start the Editing Process
We have covered the basics on how to set up your drone and camera to capture the sharpest and highest quality images possible. Now that you have the RAW camera data, you need to bring it into a good editing program. Yes, they are many editing programs out there, some even free!
Take it from someone who has tried many of them: stick with the one almost all professional photographers use-Adobe Lightroom (yes, many pro photographers use Adobe Photoshop for advanced photo manipulation, but for most standard edits Adobe Lightroom is all you will need).
Having tried many editing programs and always struggled to get proper color in my photos. Lightroom is very intuitive to use and seems to be much more streamlined for proper photo editing.
Lightroom has a huge following online and as a result they are many tutorial videos available. Yes, it is around $10 a month, but if you want an editing program that just works spend the money and get yourself a subscription to Adobe Lightroom.
There are countless videos about importing videos into Lightroom so I won’t get into that too much here. A quick Google search should get you what you need.
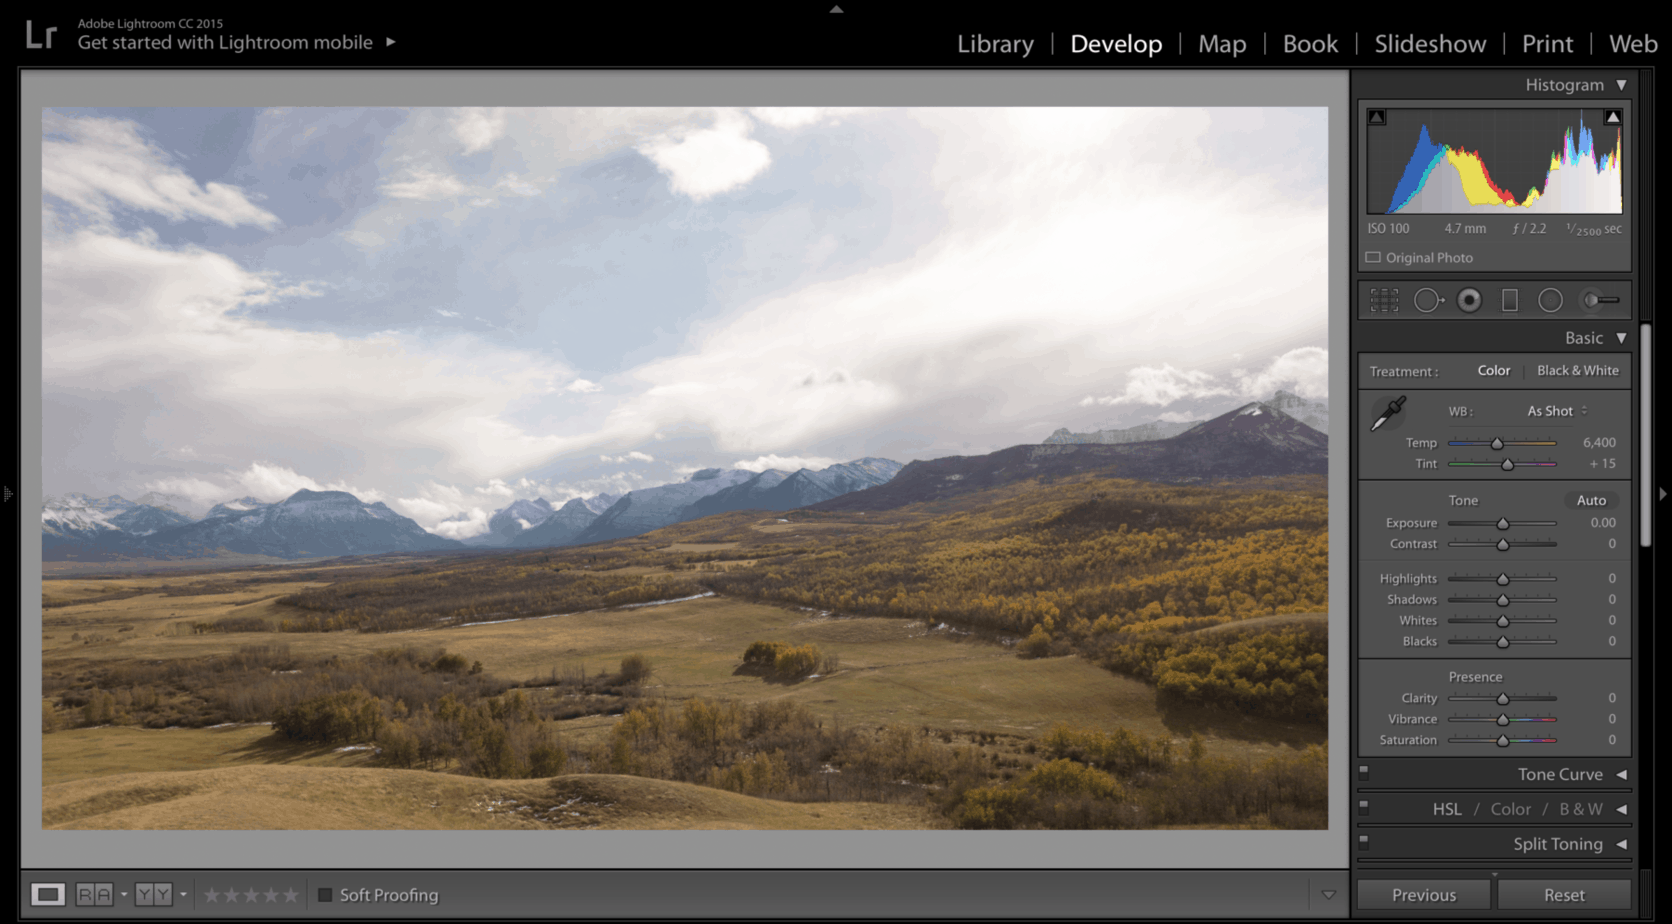
Once your photos are imported, open the Develop module (for a shortcut just hit the ‘D’ key)
In the window that pops up you will see a big set of sliders on the right hand side. This is where you will tweak your photo and make it “pop” (as discussed above the RAW image straight from the sensor is typically somewhat dull to preserve detail in the highlights and shadows).
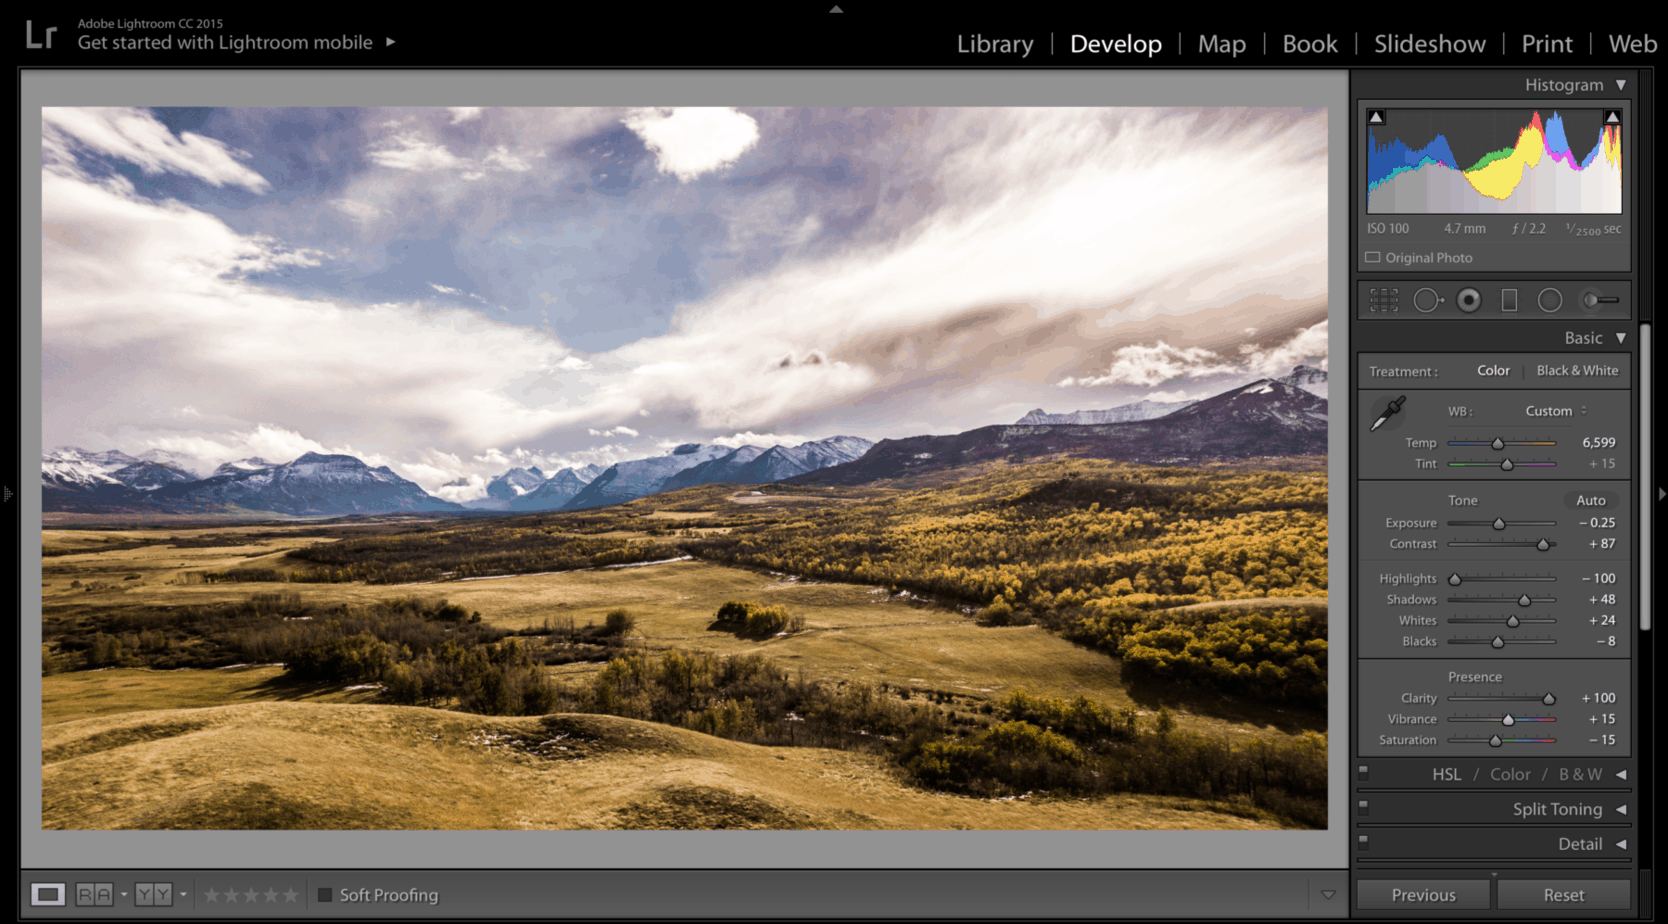
This is what the landscape image above looks like in the develop module prior to being edited:
At this point I simply start going down the list of sliders on the right hand side and adjusting them as I see fit. There is no “magic” button to perfectly edit a photo, it is all up to the photographer.
This is what my final image and develop module looks like:
A few good rules of thumb and pointers are:
- Easy on the colors and effects. New photographers typically “abuse” the saturation and vibration sliders and call it good. Typically I do not move them more than 10-15 points in either direction.
- Always set your white/black points. This is important in order to get true colors and contrast in your image. The way I do it is to hold the “option” key (Mac) or “alt” key (Windows) and the slide the Whites and Blacks slider until I start seeing hotspots in the image. When this occurs I know I have set my white or black point of the image.
- Crop your image. An often overlooked part of the editing process. Most camera sensors shoot 4×3 ratios. 16×9 Ratios are far more common these days (pretty much every screen and device is now 16×9). Wider ratios are typically more pleasing to the eyes and fit most modern day devices better.
- Use lens profile corrections. Most camera sensors and lenses add a little distortion to your image, whether some pincushion, barrel distortion etc. Adobe Lightroom has many lens profiles stored. Simply selecting your camera or lens from the dropdown under “Lens Corrections” allows for a quick correction of your image.
- Instead of adjusting saturation, try adjusting the temperature and hue of your image. If your white balance is off and your image is too cold (blue) or too warm (orange) use the temp slider to adjust your white balance. Most images look better a few ticks on the warmer side, but don’t hesitate to play around with it. Also use the hue slider and adjust as necessary. I like most of my photos with a slight magenta shift.
- Use the Gradient Tool to balance your foreground and background. Typically in aerial landscape photos the “foreground” is the ground and the “background” is the sky. Unless conditions are perfect it will be difficult to balance these two. Try using the gradient tool at the top of the develop module (simply drag down from the top or bottom). This allows you to place a mask on your image and allows you to adjust the sky and the ground separately.
Hopefully this will help some of you to set up your drone and camera to take some great aerial photos. I will continue to add to this post in the coming months as I think of things. I am working on a post that outlines best practices for editing aerial photos, hope to have it available soon!
Thank you,