
I first dabbled in some macro photography about 2 years ago. I saw some Thomas Shahan videos of him shooting jumping spiders and was hooked. Since then I have shot many different insects, and want to share some macro photography tips I have learned along the way.
To be honest I have a bit of a love/hate relationship with macro photography. It is very technically challenging and frustrating but when you nail the focus/composition/lighting the photos are incredibly rewarding. Unlike my aerial photography, I find my rate of “keepers” every time I go out very low. To be fair, I have been involved in aerial photography for much longer than macro…
The first thing I did after seeing the Shahan videos was to buy myself a Canon 100mm IS Macro lens. Although it is a great lens it didn’t magnify enough to get the very high resolution close-ups of insect eyes, or the jaws on an ant.
After using the 100mm for only a few weeks I splurged on the Canon 65mm MPE lens. This lens is incredible. Some say it is tricky to use but if you already know your camera well I don’t find it that difficult to use.
Sure, it does not have image stabilization or autofocus, but you will soon find they would be fairly useless (the autofocus anyways), especially when working with higher magnifications. Even the slightest movement throws your focus off, and autofocus systems would be constantly hunting to grab focus.
I first grabbed a few spiders and flies from the backyard but could not find a subject that I really enjoyed as much as the small jumping spiders on the Thomas Shahan videos.
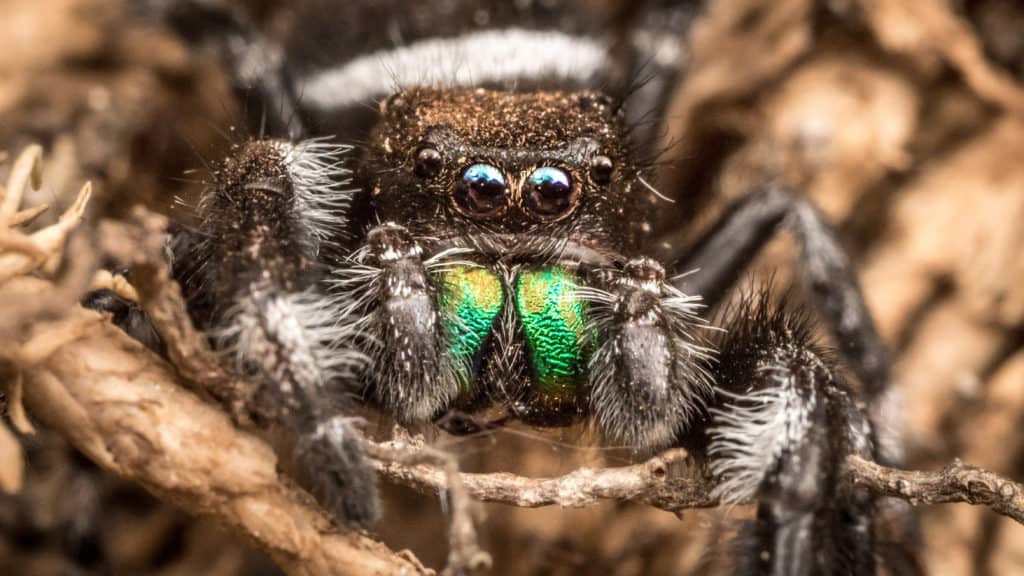
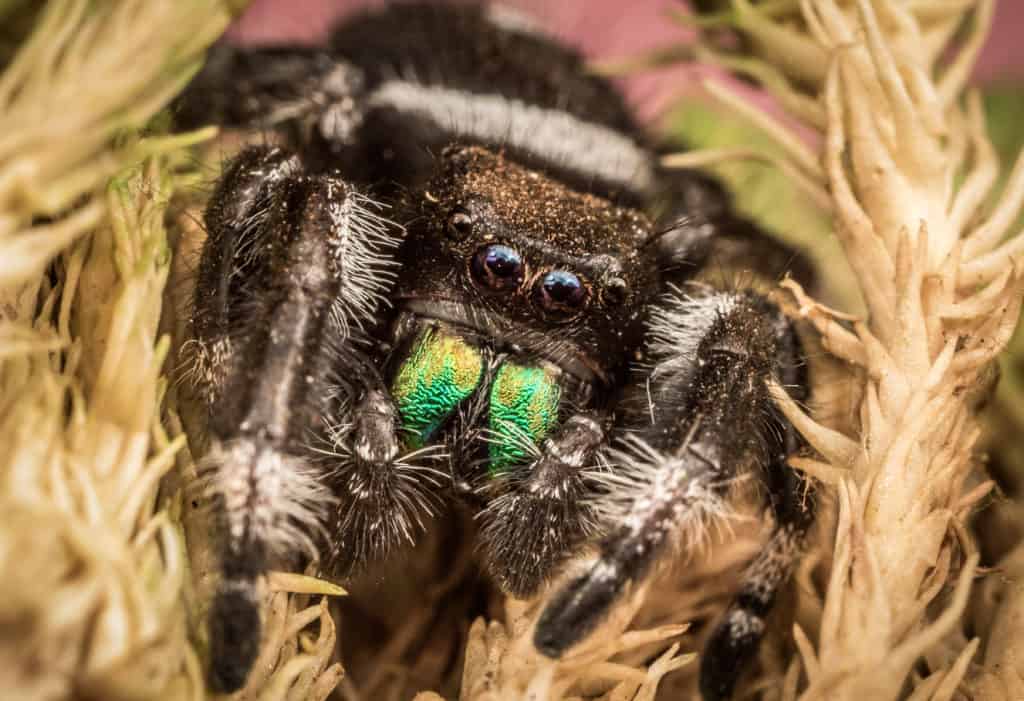
Some time later I ordered a pair of male and female jumping spiders from Tarantula Canada, specifically the Regal jumping spider, or Phidippus Regius. If you had told me five years ago I would be paying $60 for a pair of spiders I would have told you that you were on crack.
But here I was, a few days later, taking delivery of a small but well packaged Canada Post parcel. The spiders had been placed in paper towel and secured inside a small plastic tube. I had a small terrarium set up for them and promptly placed them inside.
They quickly darted into the top corner of the terrarium and stayed there for a day or so. I fed them crickets and spritzed some water inside the terrarium at least once a day.
It was really incredible to watch them hunt crickets as they would often jump clear across the small enclosure to trap a cricket. My kids watched for hours as they hunted or would drag their food across the cage to eat in peace under a rock.
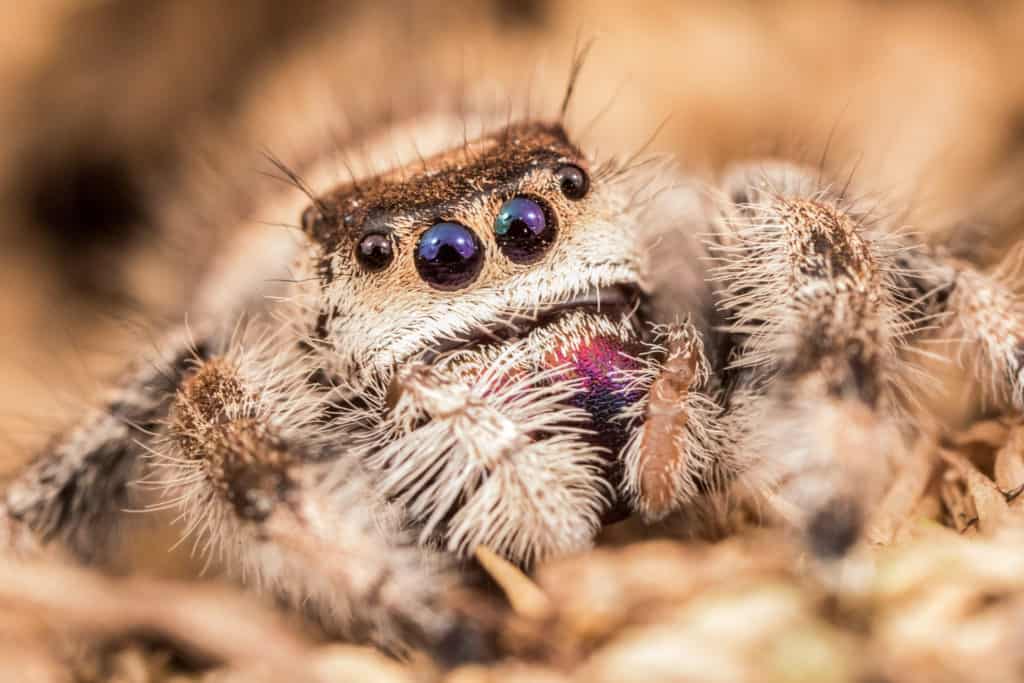
One of the reasons jumping spiders are such great macro photography subjects is because of their large forward facing eyes, but they are typically also very “tame” and are quite curious when you bring your camera in close. Some other arachnids I had tried to photograph were incredibly skittish and would dart away at the slightest movement.
Not so with jumping spiders.
The Phidippus Regius variety are some of the biggest jumping spiders around (about 2 cm), so they are a little easier for an inexperienced macro photographer to capture. They would perch on the edge of a leaf and just watch as I moved around repositioning flashes, adjusting the background, etc. If they got tired of the photo session they would simply walk away and hide under a rock.
The spiders provided months of fascinating macro photography practice, and were great subjects to photograph (as far as insects go). Just like the foxes I recently photographed, jumping spiders have a ton of “character” and are great photography subjects.
I have since moved to other macro subjects including ants, wasps, pretty much anything that looks cool under a macro lens.
I still feel that macro photography is one of the most technically difficult forms of photography to master. I’ve been practicing for quite some time now and still struggle to consistently properly light subjects, get proper focus etc.
Here is a random list of everything I’ve learned so far regarding shooting insects at the macro level…
Macro Photography Tips:
#1. Lighting a dead insect properly is hard. Lighting a moving insect is incredibly hard.
I had a few Canon 430EX flashes and a remote system already so I stuck with using them to light the bugs I was photographing. They are large and clumsy but as they are so powerful you could set them at a very high burst rate that would keep up with the camera burst rate.
I mounted them onto a Novoflex flash adapter that screwed into the bottom of the camera and held both flashes so I could move around with the whole setup. It allowed me to move around with the flashes and allowed me to dial in the flash-to-subject distance. Once I had that figured out it allowed me to keep it consistent.
#2. Use burst mode on your camera, especially if you have a manually focussed macro lens.
When shooting at magnifications of 1:1 or greater most macro lenses no longer have autofocus capabilities. This means you have to manually focus the lens on the subject.
What I have found works the best is to set my Canon 7D Mark 2 onto burst mode and simply very slowly rock the camera forward and backward and hope one of the images has the focal plane in the right place.
Sure, I’ve tried to get the focus right and just shoot a single image when I have focus, but even breathing wrong can throw off the focus of your image, the magnification levels are just that high.
If you are working in a studio setting with inanimate (read “dead”) bugs you could of course shoot tethered, make sure your focus is perfect, and shoot a single frame.
With moving subjects it is near impossible, and I have found the burst mode and a slow push or pull to/from the subject to mostly guarantee me at least one image with a properly placed focal plane.
#3. Stacking images.
At magnifications of about 2x-5x the focal planes are so razor thin that you may only get a slice of the eye in focus or only a portion of the jaw of an ant. The answer to this issue is focus stacking.
I am not very well versed in stacking images quite yet. I have had some success simply using the stacking feature included in Adobe Lightroom. As I progress a little more I will look into programs such as Zerene stacker etc. that allow for a little more control over the image stack.
Focus stacking is simply taking a series of images of the same subject with the focus on different areas and then using software to “stack” those images using the most focussed part of each image to make one composite, in-focus image.
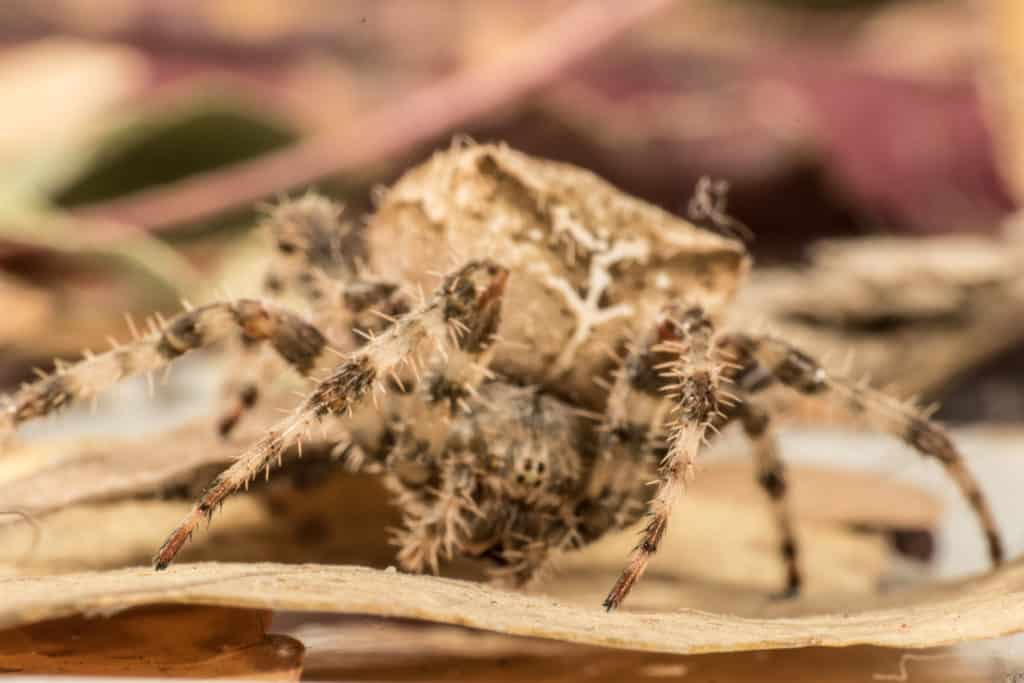
If you look at the images of a Cat Spider I photographed you will notice that the first photo has only a small portion of the front legs in focus. The second photo has been photo stacked and has much more of the arachnid in focus.

#4. If you are just starting out and don’t have the budget for one of the high end macro lenses, have a look a the Raynox Macro Lens adapter.
I actually found out about this great piece of kit after I had purchased my 65mm MPE Macro. Although it is not at the same level as the the specialist Canon lens, it is truly a remarkable and very affordable piece of kit.
The Raynox Macro adapter is simply a small clip on piece of glass that mounts to most lenses. Mounting it on the end of your prime or zoom essentially converts your lens into a macro lens, and actually works well! The best part is that it is only around $60!
Because I have the 65mm MPE I don’t tend to use it much anymore but I have seen some incredible photos done with this macro snap-on lens.
Definitely recommended if you are not quite ready to spend the money on the higher end glass.
#5. Start shooting macro using dead bugs.
I almost gave up on macro photography initially as it is simply incredibly difficult to shoot an insect in motion. Even if they are motionless on a leaf the slightest gust will throw off your focus and you will lose the shot.
I would go outside and spend hours and hours trying to capture an ant or a spider only to go through my photos later and find I had no useable shots out of the hundreds I had taken.
Scrounge around your backyard and find a dead bug such as a wasp or ant. Take it to your macro setup and pin it to a leaf or something along those lines and simply practice lighting them properly.
The photo below is one of the first dead insects I shot, and it took me close to two hours to figure out the lighting. Remember, you are only an inch or so away from the insect, so to light it from the front is very difficult (tough to position the flashes without getting shadows from the lens).
Shooting a dead insect allows you to figure out your lighting, how to diffuse your flashes, how close you will need to be when you head out to shoot live bugs, etc.

#6. Shoot against a smooth background.
Almost all insects have a tremendous amount of detail, whether it is the small hairs on their legs, the detail in their jaws or fangs, the complexity of a compound eye, etc.
I initially thought it would be cool to put them on some highly detailed or textured rocks, some moss, etc. Turns out that putting them on a detailed background typically takes away from the overall image.
The insects are already very detailed, and putting them on a very complex background does not allow for proper background separation. I have found that a smooth leaf or some fine sand makes for a much more appealing photo in most cases.
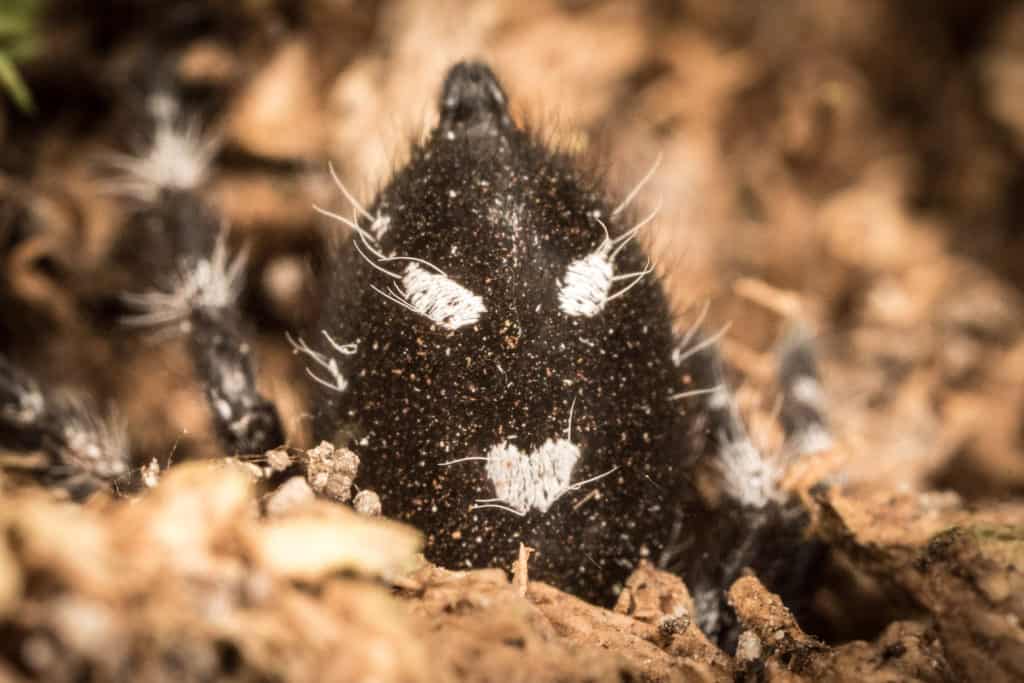
As you can see in the photo below, I placed the spider on some moss-like terrarium base that I found at the pet store, and it simply makes the photo way too busy.
If you look at this image of the cat spider again you will notice that it is simply on some leaves, and the detail of the leaves does not overwhelm the fine detail of the spider (not the best example, but will update this photo when I have one I am happy with).
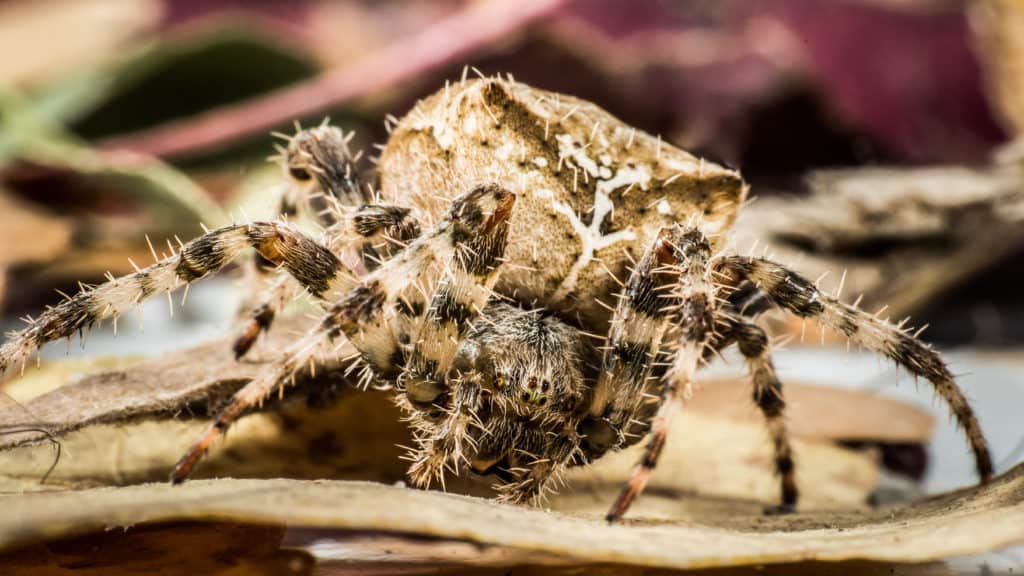
If you look at some of Thomas Shahans work you will see that he often captures the spiders while they sit on a nice green leaf or some fine sand. Background separation is very important to allow the subject to stand out relative to it’s surroundings.
As with all my blog posts and tutorials, they are always a work in progress. I hope some of these macro photography tips have helped, and as I think of more things or advance my technique I will always add to this post and update periodically.
Check back often!
Thank you!